There may come a time when you have to move all your office furniture and transport it to another location. Fitting a large, cumbersome chair into your vehicle or trailer can be a difficult task, especially if it doesn’t fit. If you’re trying to disassemble an office chair to return to the manufacturer or seller, you might not know where to begin to make the chair fit into the original box. No matter your reason for disassembling your office chair, there are a few things you need to consider, tips and tricks, and numerous ways to take your chair apart to make it more compact for transportation.
Full Disclaimer: We are an office furniture dealer and sell some of the office ergonomic chairs we review. To learn more about the products we sell, our review process and why you can trust us, please visit: Why we’re different. Who is BTOD.com and The Learning Center?
How To Disassemble An Office Chair
- How To Remove Office Chair Headrest
- How To Remove Office Chair Backrest
- How To Remove Office Chair Armrests
- How To Remove Office Chair Cylinder and Base
- How To Remove Office Chair Casters
- Seven Things To Consider When Disassembling an Office Chair

Most headrests on office chairs are attached with a few bolts. To remove the headrest from your chair, first see if you need to remove a cover plate, or tabs. Once those are removed, using a screwdriver or Allen wrench, remove all bolts from the headrest. After the headrest is removed, place the cover plate or tabs back onto the chair. Don’t forget to put all small, loose parts into a bag for safe keeping.
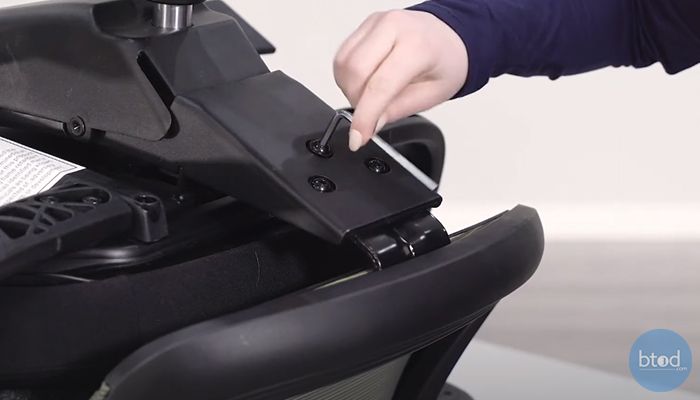
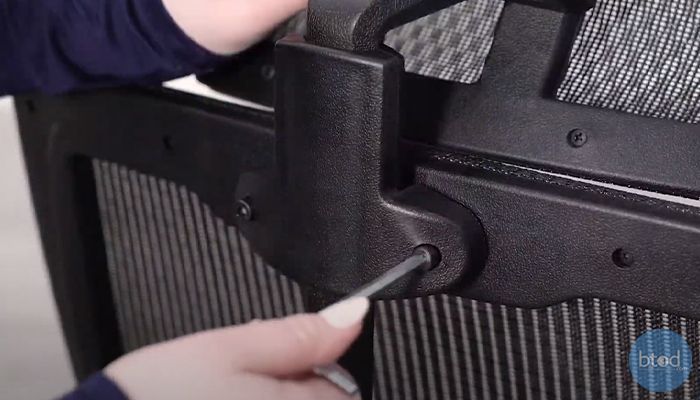
For most office chairs, you should be able to easily remove the backrest because they are attached with bolts at the back of the chair. On some office chairs this will not be able to be removed because the backrest is attached to the frame, such as the Steelcase Leap. To remove the backrest, use an Allen wrench or screw driver to remove the bolts underneath the chair that are holding the backrest in place. Once all screws and/or washer are removed from the chair, place them into a bag so you don’t lose them and keep it with the chair.
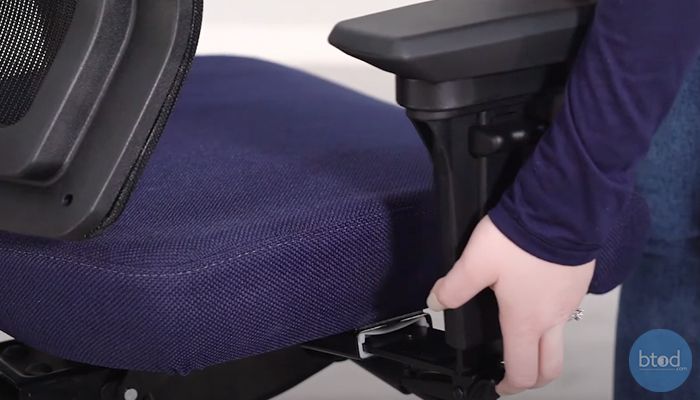
Armrests only need to removed if absolutely necessary. Armrest can contain multiple parts, so it is best to remember the order in which you are talking them off of the chair. Start by removing the bolts from the chair with an Allen wrench or screwdriver. Then, remove any washers or plates. Place all hardware in a bag and keep it with the chair. Some chairs you can easily remove the armrest by pulling them out of the slot underneath the chair while activating the adjustment lever.
Before you remove the cylinder, remember that it can easily be damaged when trying to remove it. To remove the cylinder, you’ll need a large pipe wrench. Before you start, be sure to protect your table’s surface and the floor. To get good grip and to protect the cylinder, add duct tape to the teeth of the pipe wrench.
Using the pipe wrench, clamp down on the cylinder near the bottom of the mechanism. Once tight to the cylinder, turn the pipe wrench a quarter turn or until it comes loose. Cylinders do not screw on, so loosen it until you can pull it from the mechanism.
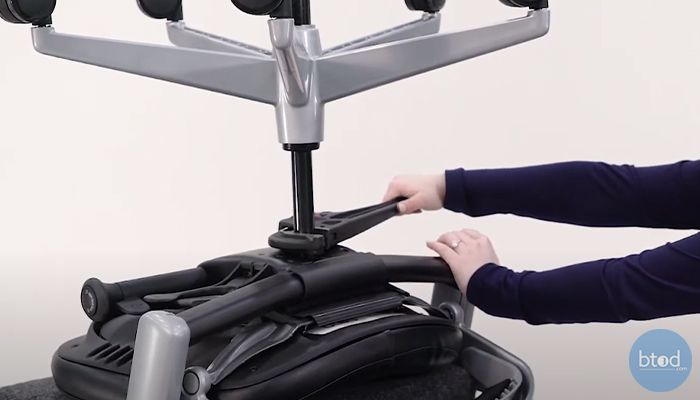
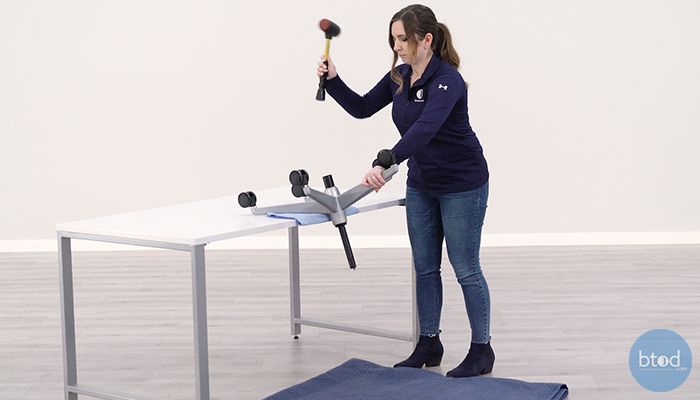
To remove the cylinder from the base, you’ll need to use a rubber mallet. Turn the base upside down. Don’t forget to protect your surface and floor. Stand back so the cylinder doesn’t hit your feet. Use the rubber mallet to dislodge the cylinder from the base. Tap sides of the cylinder if it is really stuck.
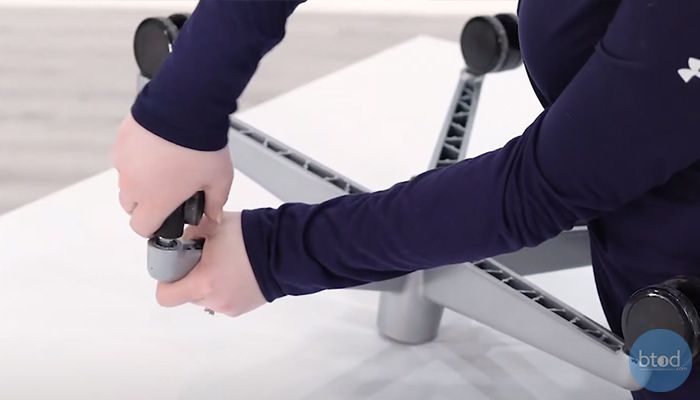
Most casters on office chairs are just popped right into the base. You shouldn’t have to remove casters unless you need to for replacement or a return. To remove the casters, place the base upside down with the casters facing up. Pull up on the casters to remove them.
Remember How The Chair Came
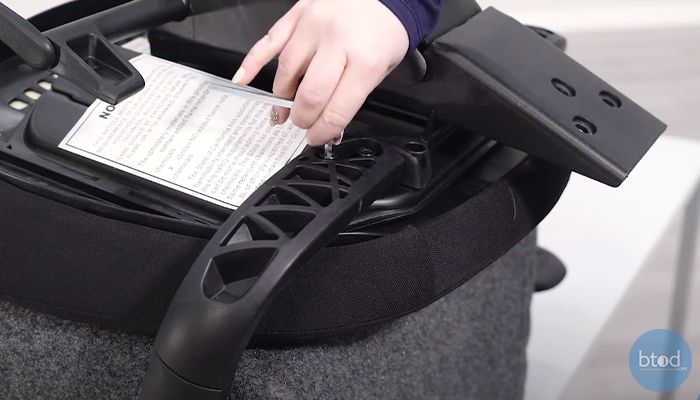
Before disassembling your office chair, it may be helpful to remember how your chair arrived. Some office chairs come in multiple pieces, which means you can most likely disassemble the chair in the opposite order of assembly. Other chairs arrive only needing to add the cylinder to the base, and the chair onto the cylinder and base. This means you will most likely have to remove the chair from the cylinder in order to disassemble it. If your chair arrived fully assembled, you will need to figure out what you can and cannot remove so you don’t damage your chair. Some manufacturers provide disassembly instructions which can be helpful when taking your chair apart.
Try Not To Disassemble What’s Not Necessary
When it comes to disassembling your office chair, think about why you need it disassembled. Ideally, you don’t want to disassemble parts of the chair that aren’t necessary. You may not need to remove the backrest with some chairs, or even remove it from its cylinder. Try to disassemble the chair as little as possible so you can prevent any damages to your chair. It’s always possible to contact the manufacturer to know which parts you should and shouldn’t remove from the chair for disassembly. You should never disassemble parts that are inside the mechanism.
How Things Connect and Disconnect
Looking at your office chair, you should be able to tell if parts are able to be removed or not. If you assembled it with screws, you should be able to take those parts of the chair off. Parts that are connected with screws will be easiest to remove from your office chair. These are usually parts such as a headrest, backrest, or armrests.
Parts that are connected to the mechanism without screws may be more difficult to remove. For example, removing a cylinder from the mechanism can be difficult, especially if the chair has been used for years. The cylinder is only connected by tension, so releasing that tension, can be a challenge. There are some office chairs that should not be removed at the cylinder, such as the Herman Miller Aeron, and most other Herman Miller office chairs.
Things You Can’t Or Shouldn’t Remove
There are parts of your office chair that you either can’t or shouldn’t remove due to potential damage the chair. For example, if you have a chair like the Steelcase Leap, you will not be able to remove the back or the arms because they are built into the frame. The mechanism on your chair is something we highly suggest you do not remove from your chair. Removing parts from the mechanism could make it malfunction.
There are also some office chairs we would suggest you do not remove the cylinder, such as the Herman Miller Aeron. If your chair came fully assembled, there is probably a reason for it. Removing parts from a chair that arrived fully assembled could cause permanent damage. There can also be damage caused when removing the cylinder.
Ruining The Cylinder: Is It Worth It?
When disassembling most office chairs, you’ll likely have to remove the cylinder from the mechanism and/or base. Most people don’t realize that if they have sat in their office chair for a few months or years, the cylinder will be more difficult to remove. When an office chair is assembled, the cylinder is usually set into the base, and then the chair is set on the cylinder. The cylinder stays in place with tension and breaking this tension is not always easy.
In most instances, to remove the cylinder from the mechanism, you will need something to break the tension, such as a pipe wrench. While a pipe wrench is the easiest tool to remove your cylinder, it can actually cause damage to the cylinder. If you’re planning on keeping your cylinder, you will want to prevent the pipe wrench teeth from marring it up. If you get deep gouges on your cylinder from the teeth, the metal shavings and scratches get into the housing of the cylinder when you re-assemble the chair and depress the seat height lever to go down. Your chair height will most likely not move past these scratch marks, and will make your chair difficult to operate. Essentially, your cylinder is ruined, which means you will probably need a new one.
Once your cylinder is out of the mechanism, you may need to remove it from the base. This can also cause damage to your cylinder. You will need to use a rubber hammer to hit the cylinder out from the bottom of the base. If you do this, be sure to have a soft place for the cylinder to land so the top of it doesn’t get damaged.
The main question boils down to: is it worth removing your cylinder if you are just going to ruin it? While there are protective measures you can take, removing your cylinder may cause more harm than good. If you are planning on replacing the cylinder, then you’ll not need to worry about damaging it when removing it from the chair.
The Tools Required For Disassembling
Before you begin disassembling your office chair, you’ll most likely need to use tools. If you are planning on removing the cylinder from the chair, you’ll need a large pipe wrench and a rubber mallet. If you’re removing other parts such as arms, backrest, or seat, you may need a screw driver or Allen wrench. Be sure to have all tools necessary to help you disassemble your office chair.
Tips and Tricks For Disassembling An Office Chair
After knowing all of the things to consider before disassembling an office chair, be sure to follow these few tips and tricks. These will help ensure you disassemble your office chair without damaging or losing any parts of your chair.
- Put all small parts you remove into a sealed bag and keep it with the chair so you don’t lose them.
- Applying duct tape to the teeth of your pipe wrench can help prevent scratches to the cylinder. If you find that you can’t get enough grip on the cylinder, remove the tape.
- Protect the surface you’re disassembling the chair on. Use an old blanket or discarded cardboard. This helps protect not only the chair, but your surfaces.
- If you’re having difficulty knowing how to disassemble your chair, reference the assembly instructions. You can usually find them online depending on the manufacturer. Then follow the instructions in reverse order.
- Remember to not remove any unnecessary parts. Just enough that the chair fits into the space that you need it to.
- To prevent malfunction of your chair, never disassemble the mechanism.
- Use a rubber mallet to remove the cylinder from the base. If it isn’t coming out, tap the sides of the cylinder to help loosen it from the base.
Final Thoughts
While disassembling an office chair, always handle the chair with care so you don’t damage any parts. Try not to disassemble parts on the chair if it isn’t necessary. All office chairs arrive differently, so be sure to follow the original assembly instructions, and work backwards. If you’re questioning any part of the disassembly process, we advise you contact the manufacturer for guidance. We hope that all of these tips and examples help you with disassembling your office chair.
No matter what reason you have for disassembling your office chair, you must be careful so you don’t damage your chair. As previously stated, follow the original assembly instructions if your chair came with any. To help you with disassembling your chair, I will go through each part on an office chair and demonstrate the general instructions for disassembly. Note that with some chairs, you may not be able to remove certain parts if they arrived already fully attached to the frame. Contact the chair manufacturer with any questions or concerns regarding the disassembly of your office chair.